

It may seem like a small detail, but fresh caulking can brighten up your old bathtub or shower, in a flash. This is a fairly-easy, home-repair job, even for beginners.
If you’d like to learn how to take better care of your bathroom, or if you just need a quick refresher, then follow along with these steps:
For a quick, simple guide, please take a look at our video here. Or view our full text guide below.
Picking your tools
First things first, you need to get your tools. When picking up your caulking for your shower, you’re going to want to choose a tub/tile style caulk. From this category you can choose either:
Silicone:
A waterproof solution that is tough and flexible, but can be a bit trickier to apply. Silicone is more sensitive to uneven textures on surfaces, more difficult to remove, and does not allow anything to stick to it. However, its toughness will allow it to last longer, reducing reapplications, and it comes in clear, white, and almond.
Acrylic Latex:
A more forgiving material, acrylic latex can be easily smoothed onto surfaces, and easily removed. However, it will shrink and dry harder, which can cause cracks. It will also require more frequent reapplications, and comes in many colors.
Alongside your caulk and applicator, you will also need:
1. Painter’s Tape (optional)
2. Exacto knife or painters tool
3. Abbrassive scrubber
4. Cloth or paper towel
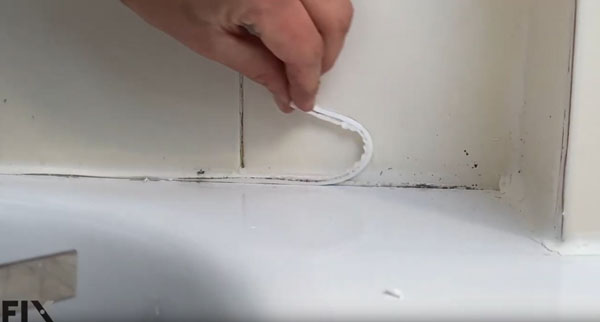
Remove existing caulking
Before applying the new caulk, you must remove the old application. If your old caulk is silicone, you’ll need to be extra careful to get every little bit out, as it is tougher and will prevent new caulking from sticking properly. To remove caulk you can use an Exacto knife or painter’s tool. Scour the edges of the old caulking, and then, once separated, pull away at it to remove the caulk from the surface. Be careful not to scratch up your tub in the process.
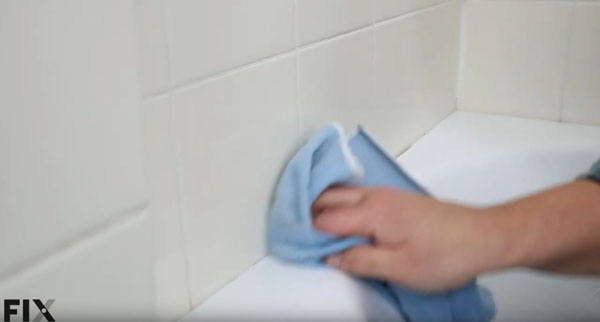
 Clean and Scrub
After removing the main chunk of caulking, there may still be some residue leftover. To remove this, use a dry, non-abrasive pad to scour the entire caulking surface. If removing silicone, you can also apply mineral spirits to your pad, to make finishing the job easier. Wipe it down afterwards with a damp rag to remove the remaining dust. At this time you can also apply a bleach cleaner and use a rag to scrub away mold that has built up. Dry with another rag or paper towel.
 Tape (optional)
While free-handing is a popular method, using painter’s tape is an easier method for beginners. Lay parallel strips of painter’s tape, about a half-inch apart, on the surfaces you want to caulk. The open area will be the guide for your caulk, so it needs to be perfectly straight. Double-check that your measurements are correct and you are certain you are ready, before moving on to the next step.
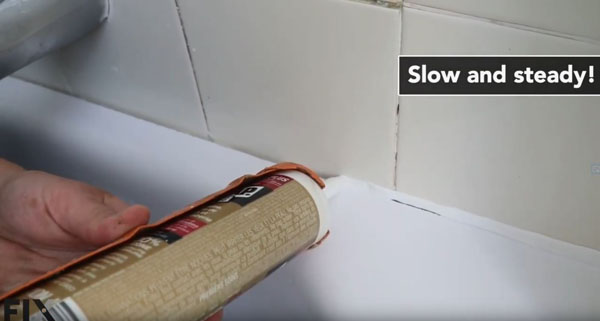
Caulk
Keep the nozzle equidistant between the two surfaces you want to caulk, so it does not come out lopsided. Apply steady pressure to the trigger, and smoothly move your nozzle down the entire length of the surface. You’ll want to keep the gun moving at a consistent speed, so the caulk does not thin out, or pile up. It needs to be a perfectly even stream, the whole way down.
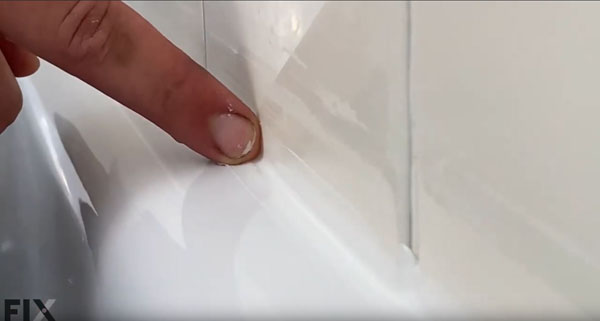
 Smooth
When the caulk has been applied, it’s time to smooth things out. Take a damp cloth or paper towel and press a small area of the material, gently, into the caulking line with your finger (you can also use your bare finger if you don’t mind the mess). In one continuous motion, drag your finger down the length of the seam to create a nice smooth surface. If you used tape, you can now remove it carefully, ensuring it does not touch any fresh caulk. Then go over the line one more time to remove any of the little bumps or edges left by the tape.
 Now just let it set for about 24 hours before taking a shower or bath and, voila, you’re good to go. Caulking is pretty simple once you know how to do it and, like all other DIY projects, it will get easier every time you do it. For any caulking parts you may need, please visit our online store here.
The article above was written by the Fix.com content team that is made up of highly-talented and experienced graphic designers, video producers, and writers. We pride ourselves on delivering invaluable information about everything, in and around your home, to make your life easier. By bringing together knowledgeable experts, with diverse backgrounds, we can provide expert knowledge on a variety of topics, while ensuring that we only deliver high-quality content that everyone can enjoy.


